Butterfly-inspired nails are a delightful way to add a touch of whimsy and elegance to your manicure. Whether you’re drawn to the intricate patterns of butterfly wings or the vibrant colors, this trend offers endless possibilities for creativity and personal expression. Here’s how to create stunning butterfly-inspired nails that are sure to turn heads.
1. Choose Your Color Palette
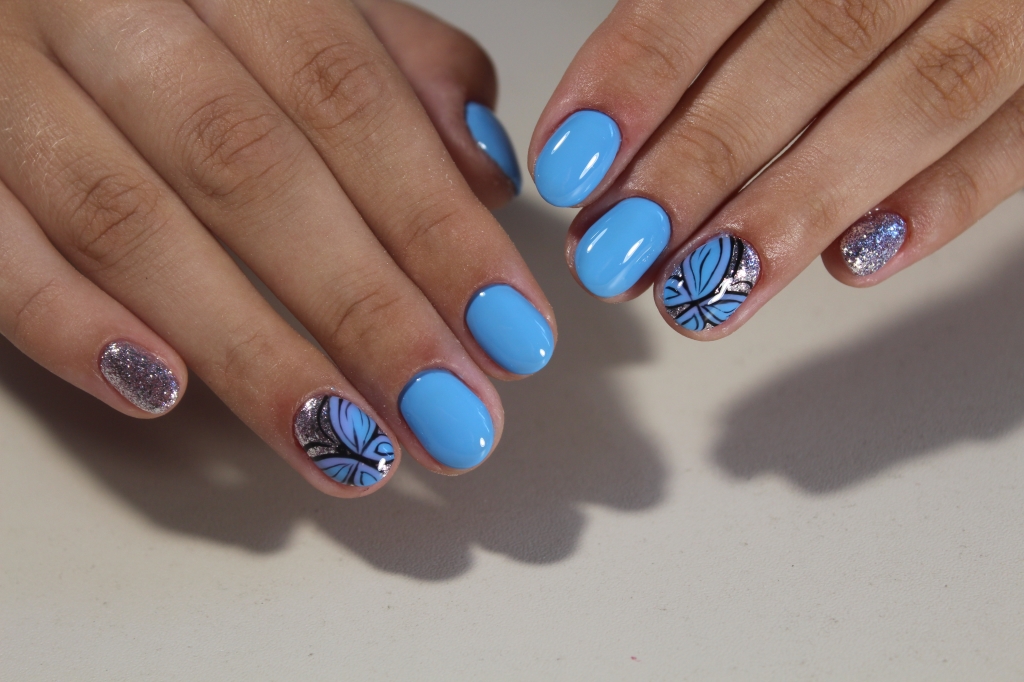
Butterflies come in a wide array of colors, so start by selecting a color palette that reflects your style. For a classic look, opt for pastel shades like soft pink, lavender, and baby blue. If you want something bolder, choose bright, vibrant colors like neon orange, electric blue, and vivid green. You can also go for a monochromatic look with different shades of one color.
2. Gather Your Supplies
To create butterfly-inspired nails, you’ll need a few essential tools:
- Base coat and top coat
- Nail polish in your chosen colors
- Nail art brushes
- Butterfly nail stickers or decals (optional)
- Dotting tool or a thin nail art pen
- Glitter or rhinestones (optional)
3. Prepare Your Nails
Start with clean, dry nails. Apply a base coat to protect your nails and create a smooth surface for the polish. Let it dry completely before moving on to the next step.
4. Apply Your Base Color
Paint your nails with the base color of your choice. This will be the background for your butterfly design. Depending on the opacity of the polish, you may need to apply two coats. Allow the polish to dry thoroughly between coats.
5. Create Butterfly Wings
Using a thin nail art brush or a nail art pen, start drawing the outline of butterfly wings on each nail. Begin by drawing a small oval shape near the tip of the nail, then add intricate wing patterns extending from the oval. For a more detailed look, you can draw tiny veins inside the wings using a contrasting color. If you prefer a simpler approach, you can use butterfly stickers or decals.
6. Add Details
Enhance your butterfly design with additional details. Use a dotting tool to add tiny dots along the edges of the wings or at the center of the butterfly. You can also apply a touch of glitter or a few rhinestones to add sparkle and dimension to your design.
7. Experiment with Different Techniques
Feel free to experiment with different techniques to achieve a unique look. Try creating a gradient effect by blending two or more colors on the wings. You can also use stamping plates with butterfly patterns for a quicker and more precise design.
8. Finish with a Top Coat
Once your design is complete, seal it with a top coat to protect your artwork and give your nails a glossy finish. This will also help your manicure last longer and prevent chipping.
9. Let Your Imagination Soar
The beauty of butterfly-inspired nails is the creative freedom they offer. Don’t be afraid to let your imagination soar and try new ideas. Whether you opt for a minimalist design or a more elaborate artwork, your butterfly nails will be a stunning and whimsical addition to your style.
Butterfly-inspired nails are perfect for any occasion, adding a touch of nature’s beauty to your fingertips. By following these steps and using your creativity, you can achieve a captivating manicure that captures the essence of these delicate creatures. Enjoy the process and let your nails flutter with charm and elegance.